
So.. I needed a table.
I had a table.
But it wasn't going to be the right fit without a little bit of modification.
I had remembered reading this blog...
I had a table.
But it wasn't going to be the right fit without a little bit of modification.
I had remembered reading this blog...

You must click on that link if you've not read her blog and YOU MUST see her furniture transformations...
they are so Wonderful!
they are so Wonderful!
Again... Inspired!!!
So...

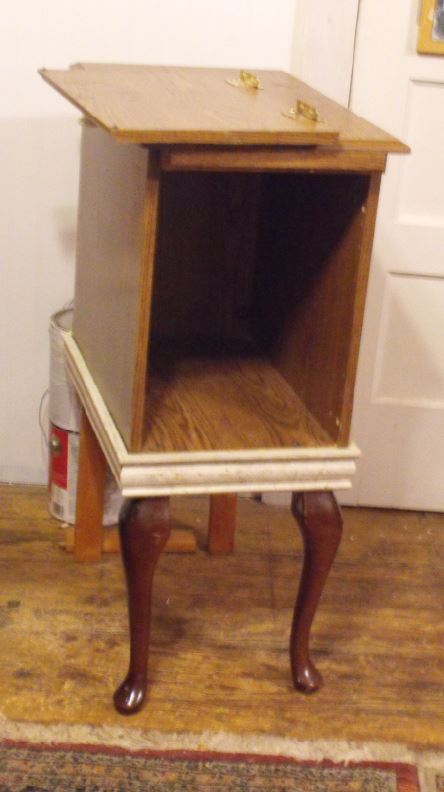
I added cabriole legs to the front --(right there, in my kitchen, isn't that were you work on all your projects? )

I made straight legs for the back from scraps...(it IS going against a wall)
and underneath, used some for braces between the new legs.
I attached all these with my drill from Black and Decker
and underneath, used some for braces between the new legs.
I attached all these with my drill from Black and Decker
I found a scrap trim piece in the shed...I needed to make an apron to cover the alterations.
I cut my very first miter cuts... ever!!!

I used this 'firestorm ORANGE' Black and Decker cordless saw
on a 45° angle... to make my cuts.
That was fun!

No, Not perfect ... Nothing a little bit of wood filler can't fix, right?

And here it is...waiting to be painted and the door to be put back on the front.
Can you say...Frankentable?
Ta-dah!
But wait there's more...
**Thank you Kristy for the use of your 'Legs' photo...Part 1 and Part 2

**************************
Here are some links for you to click on if you're interested in purchasing some cordless tools OR just browsing and comparison shopping.
Remember by clicking on these Amazon Affiliate links...
your helping this blog author contribute to the household income. :)
Delight yourself in the LORD and He will give you the desires of your heart. ~ Psalm 37:4

10 comments:
Can't wait! I love it so far!
What happened to the magazine rack on the side?
Very nice! I have frankentabled a time or two myself. No, my miters are never perfect, either. Wood putty is my friend.
I'm looking forward to seeing it all done. I like it so far!!
Oh wow, I have never made the 45 degree angle cuts, hubby always steps in and does it. Awesome!! Can't wait to see the end result!!! Now you have me wondering what can I do? LOL!!
That was quite a project to tackle. I LOVE it and it is perfect- I don't see any bolts in the head so your Frankentable isn't so bad! xo Diana
So I went over to the blog and immediately knew I would be following her. This is going to look great, Pat! Yay on your mitered cuts! I am always intimidated by those. You are like me, it doesn't have to be perfect, that takes a lot of drama out of the whole process. Can't wait to see the finished product! Ann
Great job taking on the corners, perfect or not, you have to start somewhere and every time you'll improve. Looking forward to seeing the end result. There's a shop here in town that takes old furniture and refinishes it on site with wonderful paints and finishes then sells it. It's perfect because it's older, quality stuff with a whole new look.
Hey-- good for you! Looks fun!
I'm SO impressed! I have a few things to which I'd love to add legs, but I am NOT brave enough to use a saw. I need all ten of my fingers...I use them daily.
Waiting with bated breath...
-Revi
Nice work adding the legs and molding! I totally have to try this...I always see ottomans at goodwill that could use a little leg action! Thanks for inspiring me!
-katie@mydiyhabits
Post a Comment