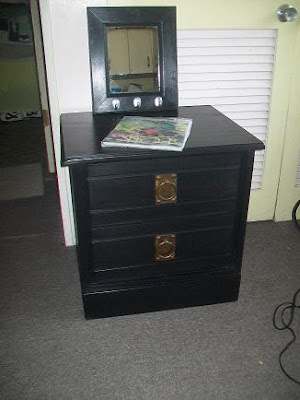
Really, It was a Story about 3 tables
...And Organizing small spaces. That's what I've been up to now.
Oh yes! I showed you the mess that was my side of the bed.
I make no excuses...it is what it is.
And! while I've already shown you my new Red...yes, Terra Cotta Red by Valspar table.
 which by the way took only 1 sample pot from Lowes and only cost $2.98
I created CHALK PAINT OUT OF IT
AND WAXED IT TOO.
I agree...
It looks ORANGE!
I wanted to point out a couple of other things.

Baskets are so practical for storage in small spaces. I have one with yarn on the little table. It's bright and cheerful ...and now it is off the floor. :)
I have another one that appears to be piled with pillows.
But don't let it fool you.
We have no closet in this room, as it is only 9' X 12' ; and so I have my shoes there (which I eliminated some of them when cleaning this messy corner) and there is a folded cotton coverlet between the shoes and the pillows.
Pillows are much prettier to look at than shoes. Aren't they?! (even if one of them is your Honey's heart bypass pillow-- a reminder to how blessed we are!)
So really, this is the story of 3 tables. Because it took two little tables to replace the one.
I like the "layered in and nested" look.
Layered and nested...when it's orderly is what I crave.
I'd rather have layered and nested on tables than the floor anyday! :D
I also like doing things a little bit differently and using what I have while spending as little money as possible. This Homemaker's Anomaly.
What? You don't hide your shoes in a basket and make it look like pillows?
I think this little organization project definitely fits the bill for different and free (almost!)
***This is the blah-blah-blah part... I bought the Valspar paint sample with my own money...and I'm not compensated to push their product or say nice things about it. The thoughts and opinions you read here are ALL MINE! There.

Delight yourself in the LORD and He will give you the desires of your heart. ~Psalm 37:4

...And Organizing small spaces. That's what I've been up to now.
Oh yes! I showed you the mess that was my side of the bed.
And no...I was not proud. I'm not proud at all when I show you things like that and then fess up; because, honestly it's been like that for a month AT LEAST!
I make no excuses...it is what it is.
And! while I've already shown you my new Red...yes, Terra Cotta Red by Valspar table.

I created CHALK PAINT OUT OF IT
AND WAXED IT TOO.
I agree...
It looks ORANGE!
I wanted to point out a couple of other things.

Baskets are so practical for storage in small spaces. I have one with yarn on the little table. It's bright and cheerful ...and now it is off the floor. :)
I have another one that appears to be piled with pillows.
But don't let it fool you.
We have no closet in this room, as it is only 9' X 12' ; and so I have my shoes there (which I eliminated some of them when cleaning this messy corner) and there is a folded cotton coverlet between the shoes and the pillows.
Pillows are much prettier to look at than shoes. Aren't they?! (even if one of them is your Honey's heart bypass pillow-- a reminder to how blessed we are!)
So really, this is the story of 3 tables. Because it took two little tables to replace the one.
I like the "layered in and nested" look.
Layered and nested...when it's orderly is what I crave.
I'd rather have layered and nested on tables than the floor anyday! :D
I also like doing things a little bit differently and using what I have while spending as little money as possible. This Homemaker's Anomaly.
What? You don't hide your shoes in a basket and make it look like pillows?
I think this little organization project definitely fits the bill for different and free (almost!)
***This is the blah-blah-blah part... I bought the Valspar paint sample with my own money...and I'm not compensated to push their product or say nice things about it. The thoughts and opinions you read here are ALL MINE! There.
Delight yourself in the LORD and He will give you the desires of your heart. ~Psalm 37:4